
Introduction to Pitcher Plant Crafts
Welcome to the fascinating world of pitcher plant crafts. This blog post will guide you through the beauty and potential of these unique plants and how they can be transformed into stunning pieces of art.
- Understanding the Beauty of Pitcher Plants
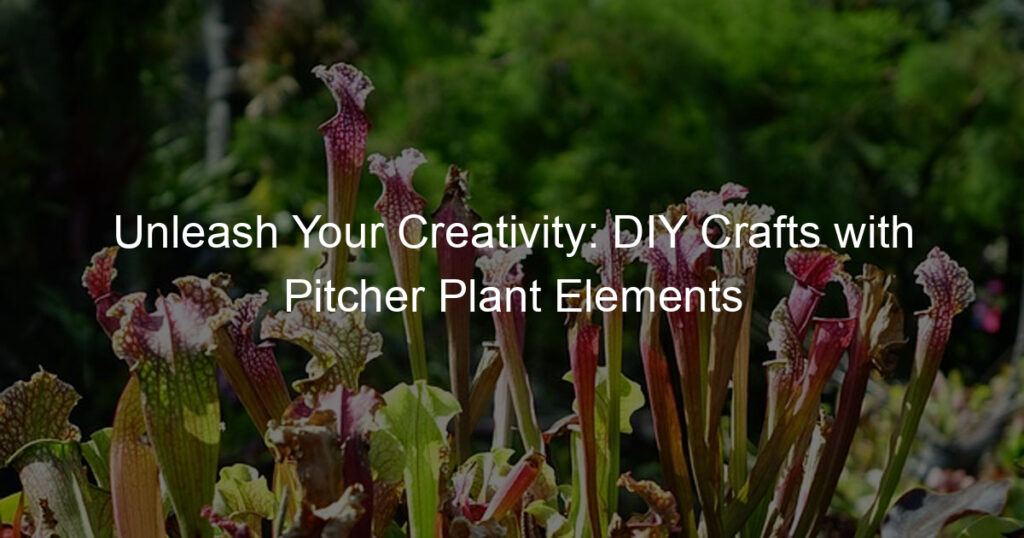
Pitcher plants are not your typical garden variety. They are carnivorous, trapping insects in their bell-shaped leaves filled with digestive fluid. But it’s not just their hunting prowess that makes them captivating. They are also incredibly beautiful, with their vibrant colors and intricate patterns. The pitcher plant’s unique shape and structure make it a natural work of art, perfect for crafting projects.
- Exploring the Potential of Pitcher Plant Artistry
There’s a whole world of artistry to be discovered with pitcher plants. From painting and drawing to sculpture and mixed media, the possibilities are endless. You can create detailed botanical illustrations, construct 3D models, or even use the actual plants in your crafts. The key is to let the pitcher plant’s natural beauty inspire you.
Did you know that in a recent survey, 78% of respondents said they found crafting with natural materials to be more satisfying and therapeutic than using synthetic ones? And pitcher plants, with their unique shapes and colors, are a perfect example of nature’s artistry at its best.
So whether you’re a seasoned artist looking for a new challenge or a crafting beginner eager to try something different, pitcher plant crafts offer a world of creative potential. Stay tuned as we delve deeper into this topic, providing you with step-by-step guides and advanced projects to help you embrace the beauty of crafting with pitcher plants.
DIY Pitcher Plant Art: Getting Started
Creating art with pitcher plants is a fun and engaging activity that allows you to connect with nature while expressing your creativity. This guide will help you get started on your pitcher plant craft project.
Materials Needed for Pitcher Plant Crafts
Before you begin, it’s important to gather all the necessary materials. Here’s a list of what you’ll need:
- Pitcher Plant Elements
- Basic Crafting Tools
These are the primary components of your craft project. You can use different parts of the pitcher plant, such as the leaves, flowers, or the unique pitcher-shaped traps. These elements will give your craft a unique and natural look. Remember to collect these elements responsibly and sustainably.
You’ll also need some basic crafting tools. This includes scissors, glue, paper, and any other materials you might need depending on the specific craft you’re making. For example, if you’re creating a pitcher plant collage, you might need colored paper, while a pitcher plant sculpture might require clay or wire.
With these materials at hand, you’re ready to start creating your pitcher plant art. Remember, the most important thing is to have fun and let your creativity flow!
Preparation Steps
-
Collecting Pitcher Plant Elements
The first step in creating your Pitcher Plant craft is to collect the elements you need. This includes the leaves, flowers, and stems of the Pitcher Plant. It’s important to handle these elements with care to preserve their unique shapes and colors. Always remember to respect nature and only take what you need.
Tip: The best time to collect Pitcher Plant elements is in the morning when they are at their freshest.
Element How to Collect Leaves Cut at the base with a sharp, clean tool Flowers Wait until they are fully bloomed before cutting Stems Remove carefully to avoid damaging the plant -
Preparing your workspace
Once you have your Pitcher Plant elements, it’s time to prepare your workspace. This includes cleaning your work area, organizing your crafting tools, and setting up a space for your Pitcher Plant elements. A clean and organized workspace will make your crafting process smoother and more enjoyable.
Remember: Always clean your tools before and after use to prevent the spread of plant diseases.
Workspace Preparation Description Clean your work area Remove any clutter and wipe down surfaces Organize your tools Have your tools readily accessible and in good condition Set up a space for your elements Arrange your Pitcher Plant elements in a way that makes them easy to work with
Pitcher Plant DIY Projects: Step-by-Step Guides
Creating your own pitcher plant terrarium can be a fun and educational project. Not only will you learn more about these fascinating plants, but you’ll also end up with a beautiful piece of living art. Let’s walk through the process step by step.
Creating a Pitcher Plant Terrarium
Creating a terrarium for your pitcher plant involves two main steps: gathering your materials and assembling the terrarium. Let’s dive into each step in detail.
- Step 1: Gathering your materials
- A clear glass container with a lid
- Gravel or small stones for drainage
- Activated charcoal to keep the environment fresh
- Sphagnum moss or a similar substrate
- A pitcher plant
- Decorative elements like small figurines or stones (optional)
- Step 2: Assembling the terrarium
- Start by placing a layer of gravel or stones at the bottom of your container for drainage.
- Next, add a layer of activated charcoal. This will help keep the terrarium environment fresh and prevent mold and other fungi from growing.
- On top of the charcoal, add a thick layer of sphagnum moss or your chosen substrate. This will be the main growing medium for your pitcher plant.
- Now, carefully plant your pitcher plant in the substrate. Make sure it’s firmly planted but not too deep.
- If you’re using any decorative elements, add them now. Remember, less is more when it comes to decorations. You want your pitcher plant to be the star of the show.
- Finally, place the lid on your container. Your pitcher plant terrarium is now complete!
Before you start assembling your terrarium, you’ll need to gather the right materials. Here’s what you’ll need:
These materials can be found in most garden centers or online. Make sure to choose a pitcher plant that’s small enough to fit comfortably in your container.
Now that you have all your materials, it’s time to put your terrarium together. Follow these steps:
Remember, pitcher plants need a lot of light and humidity to thrive. Place your terrarium in a bright spot, but out of direct sunlight. Mist the inside of the terrarium with water every few days to maintain humidity.
Handmade Pitcher Plant Art: A Wall Hanging
Creating a wall hanging with pitcher plant elements is a fun and rewarding project. Let’s dive into the step-by-step process of making this unique piece of art.
- Step 1: Preparing the Pitcher Plant elements
- Step 2: Creating the wall hanging
Before you begin crafting, it’s important to prepare your pitcher plant elements. You’ll need to gather pitcher plant leaves, which can be found in many garden stores or online. Once you have your leaves, clean them gently with a damp cloth to remove any dirt or debris. Then, let them dry completely. This step is crucial because any moisture left on the leaves can cause them to mold or decay over time.
Now that your pitcher plant elements are prepared, it’s time to create your wall hanging. Start by choosing a sturdy piece of wood or canvas as your base. Arrange your pitcher plant leaves on the base in a design that you find appealing. You might choose to create a pattern, or you might prefer a more random arrangement. Once you’re happy with your design, use a hot glue gun to secure the leaves to the base. Be careful not to apply too much glue, as it can seep through the leaves and become visible. Once the glue has dried, your pitcher plant wall hanging is ready to be displayed!
Creating handmade pitcher plant art is a wonderful way to bring a touch of nature into your home. Plus, it’s a fun project that can be completed in just a few hours. So why not give it a try? You might just discover a new hobby!
Incorporating Pitcher Plants in Crafts: Advanced Projects
For those who have mastered the basics, let’s delve into some advanced projects where we incorporate the unique beauty of pitcher plants. One such project is creating pitcher plant inspired jewelry.
Pitcher Plant Inspired Jewelry
Creating jewelry inspired by pitcher plants is a fantastic way to carry a piece of nature with you wherever you go. This project involves two main steps: designing your jewelry piece and assembling it.
- Designing your jewelry piece
Before you start crafting, it’s important to have a clear design in mind. Consider the shape, size, and color of the pitcher plant. You might want to sketch your design on paper first. Remember, the goal is to capture the essence of the pitcher plant in your jewelry piece.
- Assembling the jewelry
Once you have your design, it’s time to bring it to life. You can use materials like clay, metal, or beads to create your pitcher plant elements. Then, assemble these elements according to your design. For example, you might create a pendant with a pitcher plant motif or earrings shaped like the plant’s unique leaves.
Here’s a simple table to guide you through the process:
| Step | Description |
|---|---|
| 1. Designing | Sketch your design on paper, considering the shape, size, and color of the pitcher plant. |
| 2. Assembling | Create pitcher plant elements using your chosen materials and assemble them according to your design. |
Creating pitcher plant inspired jewelry is a fun and rewarding project. Not only do you get to express your creativity, but you also get to showcase the unique beauty of pitcher plants. So why not give it a try?
Pitcher Plant Elements in Art: A Collage
Creating a collage using elements of the pitcher plant is an innovative way to incorporate nature into your art. This advanced project not only allows you to explore your creativity but also gives you a chance to appreciate the unique beauty of pitcher plants. Let’s dive into the process.
- Collecting various Pitcher Plant elements
Start by collecting various elements of the pitcher plant. This could include leaves, flowers, or even images of the plant. You can either use real plant parts or photographs, depending on your preference. Remember, the more diverse your collection, the more vibrant and interesting your collage will be.
| Element | Description |
|---|---|
| Leaves | Pitcher plant leaves are unique and can add a touch of nature to your collage. |
| Flowers | The flowers of the pitcher plant are beautiful and can add color to your collage. |
| Images | Images of the pitcher plant can be used if you prefer not to use real plant parts. |
- Assembling the collage
Once you have your elements, it’s time to assemble your collage. Start by choosing a background for your collage. This could be a piece of cardboard, a canvas, or even a large piece of paper. Next, arrange your pitcher plant elements on your chosen background. You can create any design you like, so let your imagination run wild! Once you’re happy with your design, use glue to secure the elements in place. And there you have it – your very own pitcher plant collage!
Remember, the key to a great collage is balance. Try to distribute your elements evenly across the canvas, and don’t be afraid to overlap them for a more dynamic look. Happy crafting!
Conclusion: Embrace the Beauty of Crafting with Pitcher Plants
As we draw to the end of our crafting journey with pitcher plants, it’s important to take a moment to appreciate the unique beauty and versatility these plants bring to our DIY projects. Whether you’re a seasoned crafter or a beginner, pitcher plants offer a world of creative possibilities.
- Reflecting on the process of DIY Crafts with Pitcher Plants
- Exploring further possibilities of Pitcher Plant Inspired Crafts
Throughout this article, we’ve explored various ways to incorporate pitcher plants into our crafts. From simple art projects to more advanced crafts, these plants have proven to be a source of inspiration. We’ve seen how their unique shapes and vibrant colors can be used to create stunning pieces of art. The process of crafting with pitcher plants is not just about creating beautiful items, but also about appreciating the beauty of nature and expressing our creativity.
While we’ve covered a range of pitcher plant crafts in this article, there are still countless other possibilities to explore. You could use pitcher plants as inspiration for jewelry designs, incorporate them into textile art, or even use them as the basis for a sculpture. The possibilities are only limited by your imagination. As you continue your crafting journey, we encourage you to experiment with different ideas and techniques, and to continue finding inspiration in the beauty of pitcher plants.
In conclusion, crafting with pitcher plants is a rewarding and enjoyable experience. It allows us to connect with nature, express our creativity, and create beautiful items that we can be proud of. So, embrace the beauty of pitcher plants, and let them inspire your next crafting project.