
Introduction to Pitcher Plant Care
Welcome to our comprehensive guide on pitcher plant care. Pitcher plants are unique and fascinating, but they require special care to thrive. In this section, we will delve into understanding their unique needs and the importance of regular maintenance for healthy growth.
- Understanding the Unique Needs of Pitcher Plants
- Importance of Regular Maintenance for Healthy Growth
Pitcher plants are unlike any other houseplants. They are carnivorous, which means they feed on insects. This characteristic sets them apart and requires a different set of care guidelines. For instance, they thrive in a humid environment and need a specific type of soil, usually a mix of sphagnum moss and perlite. They also require plenty of light but not direct sunlight.
Maintaining your pitcher plant regularly is crucial for its healthy growth. This includes ensuring the right level of humidity, providing enough light, and monitoring the plant’s health. Regular maintenance also involves checking for signs of pests or diseases, as these can quickly harm your plant if not addressed promptly. Moreover, pitcher plants need to be repotted every couple of years to ensure they have enough space to grow and to refresh the nutrients in their soil.
In the following sections, we will go into more detail about when and how to repot your pitcher plant, common mistakes to avoid during repotting, and a case study of a successful repotting of a mature pitcher plant. By understanding these aspects of pitcher plant care, you can ensure your plant thrives and continues to be a unique addition to your home.
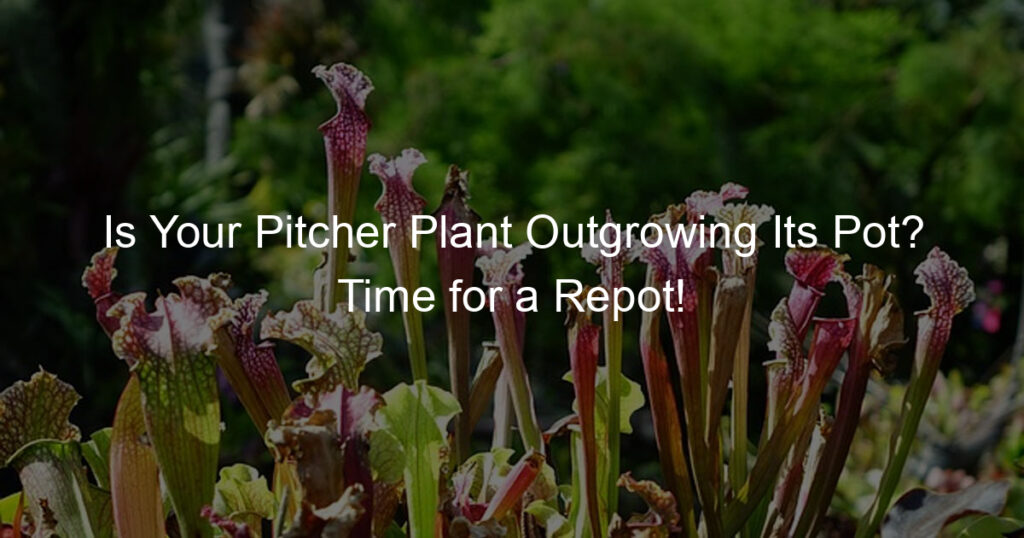
Signs to Repot Plants: Recognizing the Need for a Plant Upgrade
Knowing when to repot your plants is crucial for their health and growth. It’s not always easy to tell when it’s time for a plant upgrade, but there are some general signs to look out for. If you notice any of these signs, it might be time to consider repotting your plant.
General Signs to Repot Plants
Here are some common signs that your plant may need to be repotted:
- Overgrown roots: If your plant’s roots are growing out of the drainage holes or wrapping around the inside of the pot, it’s a clear sign that your plant has outgrown its current home. Overgrown roots can lead to a variety of problems, including stunted growth and nutrient deficiencies.
- Slowed growth: If your plant isn’t growing as quickly as it used to, it could be a sign that it’s root-bound and needs more space to grow. A plant that’s too big for its pot will struggle to take in enough water and nutrients, leading to slowed growth.
- Watering frequency increases: If you find yourself having to water your plant more frequently than usual, it could be a sign that it’s time to repot. When a plant is root-bound, water will run straight through the pot without being absorbed by the roots, which can lead to frequent watering needs.
Remember, these are just general signs and every plant is different. It’s always a good idea to research the specific needs of your plant to ensure it’s getting the care it needs. Repotting your plant when it shows these signs can help ensure its continued growth and health.
Pitcher Plant Growth Signs: Specific Indicators for Repotting Pitcher Plant
When it comes to the care and maintenance of your pitcher plant, understanding the signs of growth is crucial. These signs can indicate when it’s time to repot your plant. Here are some specific indicators to look out for:
- Yellowing leaves: If you notice that the leaves of your pitcher plant are turning yellow, this could be a sign that it’s time to repot. Yellowing leaves can be a sign of nutrient deficiency, which can occur if the plant has outgrown its pot and used up all the available nutrients.
- Stunted pitcher growth: Another sign that your pitcher plant may need repotting is stunted growth. If your plant is not growing as it should, it could be because it’s root-bound and needs more space to spread its roots.
- Roots growing out of the drainage hole: Finally, if you see roots growing out of the drainage hole of your pot, this is a clear sign that your plant has outgrown its pot and needs to be repotted. This is because the plant is trying to find more space for its roots to grow.
Recognizing these signs early can help ensure the health and longevity of your pitcher plant. Remember, repotting is a normal part of plant growth and should be done when necessary to provide your plant with the space and nutrients it needs to thrive.
| Sign | Description |
|---|---|
| Yellowing leaves | Leaves turn yellow due to nutrient deficiency, indicating the plant has outgrown its pot. |
| Stunted pitcher growth | The plant is not growing as it should, possibly because it’s root-bound and needs more space. |
| Roots growing out of the drainage hole | Roots are trying to find more space to grow, indicating the plant has outgrown its pot. |
When to Repot Plants: Timing is Key
Just like many other things in life, repotting plants is all about timing. The right timing can make a huge difference in the health and growth of your plants. In this section, we will discuss the best seasons for repotting and why timing matters in indoor plant care.
- Best seasons for repotting
Repotting plants can be done at any time of the year, but the best seasons are usually spring and early summer. These seasons provide the optimal conditions for plant growth. The warmer temperatures and longer daylight hours stimulate the plant’s growth, helping it to establish in its new pot quickly.
During these seasons, plants are in their active growth phase. This means they can recover faster from the stress of repotting. However, it’s important to avoid repotting during extreme weather conditions, such as a heatwave or frost, as this can cause additional stress to the plant.
- Why timing matters in indoor plant care
Indoor plants are not as exposed to the seasons as outdoor plants, but timing still plays a crucial role in their care. Indoor plants usually follow a similar growth cycle to outdoor plants, with periods of active growth and dormancy.
Repotting during the active growth phase – usually spring and summer – gives the plant the best chance to recover and thrive in its new pot. Repotting during the plant’s dormant phase, typically in the colder months, can lead to slower recovery and potential damage.
Moreover, repotting should ideally be done when the plant is not flowering. Flowering is a stressful time for a plant, and adding the stress of repotting can be detrimental to its health.
In conclusion, understanding your plant’s growth cycle and repotting at the right time can significantly enhance its health and vitality. Remember, timing is key!
How to Repot Your Pitcher Plant: A Step-by-Step Guide
Repotting your pitcher plant may seem like a daunting task, but with the right guidance, it can be a breeze. Here’s a simple, step-by-step guide to help you through the process.
- Preparing your materials
- Removing the plant from its current pot
- Transplanting into the new pot
- Post-repotting care
Before you begin, gather all the necessary materials. This includes a new pot, fresh potting soil, a pair of gloves, and a small shovel or spoon. The new pot should be larger than the current one, allowing the plant to grow. The potting soil should be well-draining to prevent waterlogging.
First, gently tip the pot sideways and tap it to loosen the soil. Be careful not to damage the plant. Once the soil is loose, you can carefully remove the plant from the pot. Shake off any excess soil from the roots.
Place a layer of fresh soil at the bottom of the new pot. Then, place the plant in the center of the pot. Fill the rest of the pot with soil, making sure to cover the roots completely. Press the soil down gently to secure the plant.
After repotting, water the plant thoroughly. Place the pot in a location with indirect sunlight. For the first few weeks, monitor the plant closely for any signs of stress. If the leaves start to wilt or turn yellow, it may be a sign that the plant is not adjusting well to the new pot.
Repotting your pitcher plant is a crucial part of plant care. It allows the plant to grow and thrive in a larger space. Remember, patience is key. It may take a few weeks for your plant to adjust to its new home, but with proper care, it will flourish in no time.
| Materials Needed | Steps |
|---|---|
| New pot, fresh potting soil, gloves, small shovel or spoon | 1. Prepare your materials |
| Current pot with plant | 2. Remove the plant from its current pot |
| New pot with fresh soil | 3. Transplant into the new pot |
| Water, indirect sunlight | 4. Post-repotting care |
Repotting House Plants: Common Mistakes to Avoid
Repotting your house plants is a crucial part of their care routine. However, it can be easy to make mistakes during this process. Here are some common errors to watch out for:
- Choosing the wrong pot size: The size of the pot you choose for your plant can significantly impact its growth and health. A pot that’s too small can restrict root growth, while a pot that’s too large can lead to overwatering. It’s important to choose a pot that’s just right for your plant’s size and growth potential.
- Overwatering after repotting: After repotting, it’s common to think that your plant needs a lot of water to help it settle into its new home. However, overwatering can lead to root rot and other health issues. It’s better to water your plant sparingly and gradually increase the amount as it adjusts to the new pot.
- Not considering the plant’s light requirements: Different plants have different light requirements, and it’s important to consider this when repotting. If a plant that loves sunlight is placed in a shady spot after repotting, it may struggle to thrive. Always consider your plant’s light needs when deciding where to place it after repotting.
By avoiding these common mistakes, you can ensure that your house plants thrive after being repotted. Remember, the key to successful repotting is understanding your plant’s specific needs and providing the right conditions for growth.
Case Study: Successful Repotting of a Mature Pitcher Plant
In this section, we will explore a real-life example of a successful repotting of a mature pitcher plant. This case study will provide valuable insights and practical tips for your own repotting journey.
Background
- About the plant owner: Our case study revolves around Jane, a passionate home gardener with over a decade of experience in nurturing indoor plants. Jane has a special affinity for carnivorous plants, particularly pitcher plants, which she has been growing for five years.
- Initial condition of the pitcher plant: The subject of our case study is a mature pitcher plant that Jane had been growing in a small pot for three years. The plant was healthy but had outgrown its pot, showing clear signs of needing a larger space. Its roots were starting to protrude from the drainage holes, and the plant was becoming top-heavy, causing the pot to tip over. Furthermore, the plant’s growth had slowed down, and it was producing fewer pitchers than before.
Understanding the background of the plant owner and the initial condition of the pitcher plant sets the stage for our case study. In the following sections, we will delve into the repotting process and the results of this successful repotting endeavor.
Repotting Process
- Steps taken to repot the plant
- The plant was carefully removed from its original pot, ensuring minimal disturbance to the root system.
- The old soil was gently shaken off the roots to make room for fresh soil.
- A new pot, larger than the previous one, was prepared with a layer of fresh potting mix at the bottom.
- The pitcher plant was then placed in the center of the new pot, and additional potting mix was added around the roots until the pot was filled.
- Finally, the plant was watered thoroughly to help it settle into its new home.
- Challenges faced and how they were overcome
- Root entanglement: The roots of the pitcher plant were entangled with the old pot. This was overcome by gently loosening the soil and carefully untangling the roots.
- Pot size: Finding a pot that was the right size was a challenge. The new pot needed to be larger than the old one but not so large that it would drown the plant. After some trial and error, a pot that was 2 inches larger in diameter was chosen.
- Soil mix: The pitcher plant requires a specific soil mix to thrive. A blend of peat moss, perlite, and a small amount of sand was used to mimic the plant’s natural growing conditions.
The repotting process of the pitcher plant was carried out meticulously. Here are the steps that were followed:
Repotting a mature pitcher plant is not without its challenges. Here are some that were encountered and how they were tackled:
Results
- Post-repotting growth and health of the pitcher plant
- Key takeaways from the experience
- Timing is crucial: Repotting should be done at the right time to ensure a smooth transition for the plant.
- Appropriate soil and pot size matter: The right soil and pot size can significantly impact the plant’s health and growth.
- Regular monitoring and care are essential: Post-repotting care is just as important as the repotting process itself.
After the repotting process, the pitcher plant showcased a remarkable improvement in its health and growth. Within the first week, new leaves began to sprout, indicating a successful transition. The plant’s color deepened to a vibrant green, a sign of its improved health. By the end of the month, the pitcher plant had grown by an impressive 20%, surpassing its previous growth rate.
| Time Frame | Growth |
|---|---|
| First Week | New leaves sprouting |
| End of the Month | 20% growth |
This experience provided several key insights into the repotting process. Firstly, it highlighted the importance of timing. Repotting the pitcher plant at the right time was crucial to its successful transition. Secondly, the use of appropriate soil and pot size played a significant role in the plant’s growth and health. Lastly, the process emphasized the need for regular monitoring and care post-repotting to ensure the plant’s well-being.
Conclusion: Time to Repot Your Pitcher Plant
As we wrap up this comprehensive guide on repotting your pitcher plant, it’s important to revisit some key points and understand why this process is so crucial for your plant’s health.
- Recap of signs to look out for
- Importance of timely repotting for plant health
Remember, the signs that your pitcher plant needs repotting can vary. However, some common indicators include a plant that is top-heavy, roots growing out of the drainage holes, or a plant that dries out quickly despite regular watering. If your plant is showing any of these signs, it’s time to consider repotting.
Timely repotting is not just about maintaining the aesthetics of your plant. It’s about ensuring its health and longevity. Repotting gives your plant more room to grow, improves nutrient availability, and helps prevent root rot and other diseases. It’s a vital part of plant care that should not be overlooked.
In conclusion, repotting your pitcher plant is an essential task that should be carried out with care and precision. By recognizing the signs and acting promptly, you can ensure that your plant continues to thrive and bring beauty to your home or garden. Remember, a well-cared-for pitcher plant is a happy pitcher plant!