Introduction to Pitcher Plants Propagation
Welcome to the fascinating world of pitcher plants! These unique and captivating plants are known for their unusual shape and carnivorous nature. But did you know that you can grow your own pitcher plants at home? In this blog post, we will explore the basics of pitcher plants and the reasons why you might want to propagate them.
- Understanding the Basics of Pitcher Plants
- Why Propagate Pitcher Plants?
Pitcher plants, scientifically known as Nepenthes, are a group of carnivorous plants that have evolved to survive in nutrient-poor soils. They do this by trapping and digesting insects in their pitcher-shaped leaves, hence the name. There are over 100 species of pitcher plants, each with its own unique characteristics and care requirements. But one thing they all have in common is their need for high humidity and bright, indirect light.
Propagating pitcher plants can be a rewarding experience for several reasons. Firstly, it allows you to grow more plants without having to buy them. This not only saves you money but also gives you the satisfaction of growing your own plants from scratch. Secondly, propagation can help preserve the genetic diversity of pitcher plants, many of which are endangered in the wild due to habitat loss. Lastly, growing pitcher plants can be a fun and educational project for kids, teaching them about plant biology and the importance of conservation.
Now that we’ve covered the basics, let’s dive deeper into the process of propagating pitcher plants. Stay tuned for our next section, “Propagation Deep Dive: Understanding the Process”.
Propagation Deep Dive: Understanding the Process
In this section, we will delve into the fascinating world of plant propagation. We will define what propagation is and explain its crucial role in plant cultivation.
What is Propagation?
Propagation, in the simplest terms, is the process of creating new plants from a variety of sources – seeds, cuttings, bulbs, and other plant parts. It’s a natural way of plant reproduction and a commonly used method in horticulture.
- Definition and explanation of propagation: Propagation is the act of producing new plants. This can be achieved through several methods, including growing from seeds, taking cuttings from existing plants, or dividing roots. It’s a vital process in nature that allows plants to spread and survive. It’s also a valuable tool for gardeners, allowing them to create new plants at little to no cost.
- The role of propagation in plant cultivation: Propagation plays a pivotal role in plant cultivation. It allows for the reproduction and spread of plants, ensuring their survival. In a garden setting, propagation can help a gardener expand their plant collection, replace older plants, or grow more of a plant they particularly enjoy. It’s a cost-effective way to increase the variety and quantity of plants in your garden.
Understanding propagation is key to successful plant cultivation. Whether you’re a professional horticulturist or a home gardener, mastering the art of propagation can help you grow a thriving, diverse garden.
Propagation Techniques for Pitcher Plants
There are several methods to propagate pitcher plants, each with its unique steps and considerations. Here, we will explore three main techniques: seed propagation, cuttings propagation, and division propagation.
- Seed Propagation
Seed propagation is a natural method of growing pitcher plants. It involves planting the seeds in a suitable growing medium and providing the right conditions for germination. This process can take several weeks to months, as pitcher plant seeds require a period of cold stratification to germinate. However, it’s a rewarding process as you get to witness the entire life cycle of the plant.
- Cuttings Propagation
Propagation by cuttings is a faster method compared to seed propagation. In this method, a healthy leaf or stem cutting from a mature pitcher plant is planted in a suitable medium. The cutting will develop roots and eventually grow into a new plant. This method is preferred when you want to produce an exact clone of the parent plant.
- Division Propagation
Division propagation is the process of dividing a mature pitcher plant into two or more parts, each with its roots and shoots. This method is typically used for mature plants that have grown large enough to be divided. It’s a quick and efficient way to multiply your pitcher plants, but it requires careful handling to avoid damaging the plant.
In conclusion, each propagation technique has its advantages and is suitable for different situations. The choice of method depends on your personal preference, the resources available, and the specific species of pitcher plant you are growing.
Growing Pitcher Plants from Cuttings: A Step-by-Step Guide
Propagating pitcher plants from cuttings is a rewarding and fascinating process. With the right preparation and care, you can grow your own pitcher plants at home. Let’s dive into the preparation process.
Preparation for Propagation
Before you start, it’s important to prepare properly. This includes choosing the right cutting and gathering all the necessary tools and materials.
- Choosing the right cutting
- Tools and materials needed
When selecting a cutting, choose a healthy, mature pitcher plant. Look for a stem that is firm and green, with at least one leaf node. The leaf node is the small bump where a new leaf will grow. Avoid stems that are soft, discolored, or damaged.
You’ll need a few basic tools and materials to propagate your pitcher plant. These include a sharp, clean knife or pruning shears to take the cutting, a pot with drainage holes, a potting mix suitable for carnivorous plants, and a plastic bag or propagator to create a humid environment for the cutting.
Once you have your cutting and your tools ready, you’re all set to start the propagation process. Remember, patience is key when growing pitcher plants from cuttings. It may take several weeks for the cutting to root and start growing, but the wait will be worth it when you see your new pitcher plant thriving.
Plant Cuttings Propagation Process
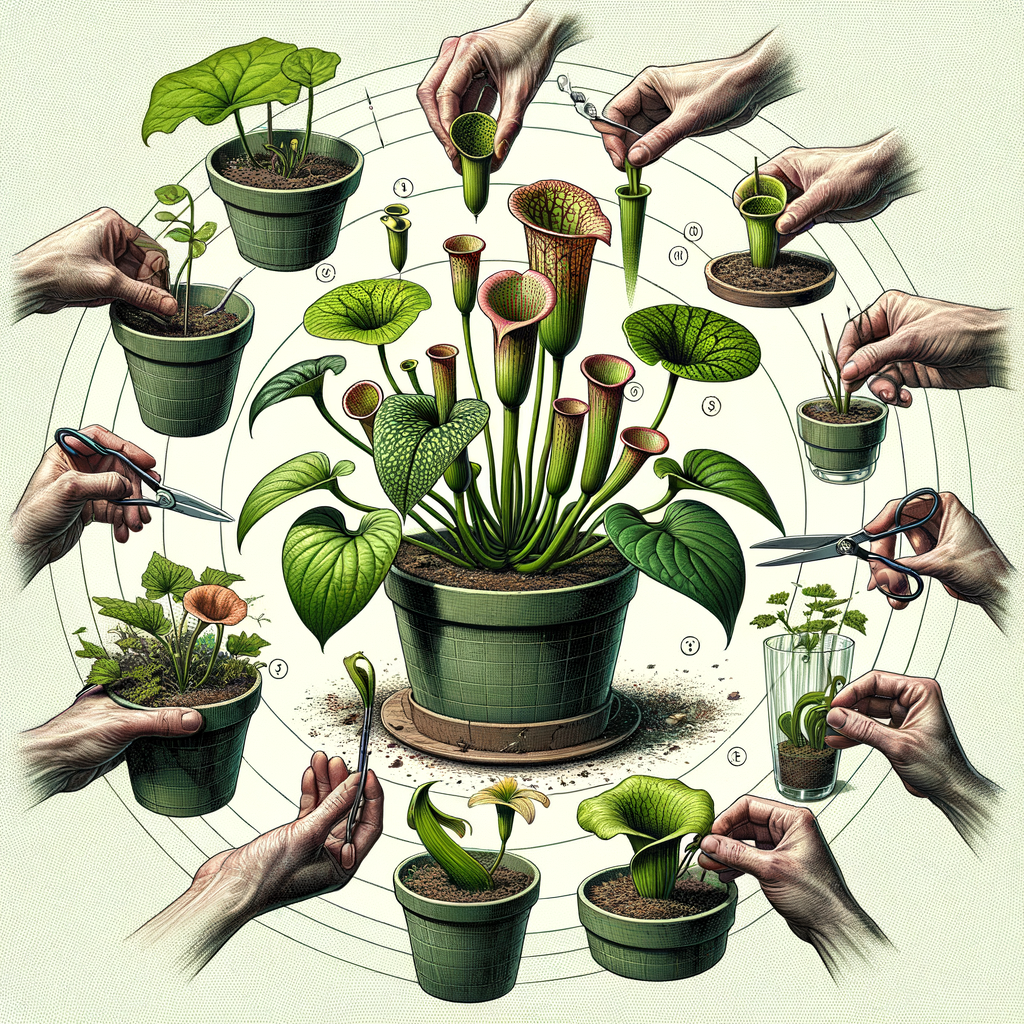
Propagating Pitcher Plants from cuttings is a fascinating process. It involves four main steps. Let’s delve into each one.
- Step 1: Taking the Cutting
- Step 2: Preparing the Cutting
- Step 3: Planting the Cutting
- Step 4: Caring for the New Plant
The first step in the propagation process is taking the cutting from the parent plant. Choose a healthy, mature pitcher plant. Using a clean, sharp knife, cut a stem that has at least two nodes (the points where leaves attach). This is the part that will grow into a new plant. Remember to make a clean cut to avoid damaging the plant.
Once you have your cutting, it’s time to prepare it for planting. Remove the lower leaves, leaving only the top two or three. This helps the cutting focus its energy on root development. Dip the cut end into a rooting hormone. This step is not mandatory, but it can significantly increase the chances of successful rooting.
Now, it’s time to plant your cutting. Fill a pot with a well-draining soil mix. Make a hole in the center and place your cutting inside, ensuring the nodes are covered with soil. Gently firm the soil around the stem.
After planting, the real care begins. Place the pot in a location with bright, indirect light. Water regularly, but avoid overwatering as it can lead to root rot. In a few weeks, you should see new growth, indicating that your cutting has successfully rooted and is on its way to becoming a full-fledged pitcher plant.
Propagation from cuttings is a rewarding process, especially when you see the new plant thriving. It’s a testament to the marvels of nature and the joy of gardening.
Pitcher Plants Cultivation: Post-Propagation Care
Once you’ve successfully propagated your pitcher plants, the journey isn’t over. It’s now time to focus on post-propagation care to ensure your plants thrive. This involves careful watering and feeding, managing light and temperature, and knowing when to pot and repot. Let’s delve into each of these aspects.
- Watering and feeding
- Light and temperature requirements
- Potting and repotting
Watering pitcher plants requires a delicate balance. They prefer moist soil, but overwatering can lead to root rot. It’s best to water them when the top inch of soil feels dry to the touch. Use rainwater or distilled water, as tap water often contains minerals that can harm these plants. As for feeding, pitcher plants are carnivorous and get their nutrients from insects. If your plant is indoors and doesn’t have access to insects, you can supplement with a small amount of orchid fertilizer every few months.
Pitcher plants love light. They thrive in bright, indirect light, so a spot near a window is ideal. However, they can also tolerate lower light conditions. As for temperature, they prefer a range of 70-95 degrees Fahrenheit during the day and 60-70 degrees at night. If the temperature drops below 60, they may enter a dormant state.
When you first pot your propagated pitcher plant, choose a pot with good drainage and use a soil mix designed for carnivorous plants. As the plant grows, it may become root-bound and require repotting. This is usually necessary every 2-3 years. When repotting, be gentle to avoid damaging the roots and always use fresh soil.
To summarize, taking care of pitcher plants after propagation involves careful watering and feeding, providing the right light and temperature conditions, and potting and repotting as needed. With these steps, your pitcher plants will continue to grow and thrive.
Indoor Pitcher Plants Propagation: Tips and Tricks
If you’re looking to propagate pitcher plants indoors, there are several key factors to consider. These include choosing the right location, managing the indoor climate, and understanding common challenges and solutions. Let’s delve into these aspects to ensure your indoor pitcher plants thrive.
- Choosing the right location
- Managing indoor climate
- Common challenges and solutions
When it comes to indoor pitcher plants propagation, location is everything. These plants need a spot that gets plenty of indirect sunlight. A window sill that faces east or west is ideal. However, avoid placing your plant in direct sunlight as it can scorch the leaves. Also, ensure the area is free from drafts, as pitcher plants prefer a stable environment.
Pitcher plants are tropical in nature, which means they thrive in humid environments. To replicate this indoors, consider using a humidifier or placing the plant on a tray filled with pebbles and water. The evaporation will increase the humidity around the plant. The ideal temperature for these plants is between 70 and 75 degrees Fahrenheit during the day and around 60 degrees at night.
Indoor propagation of pitcher plants can come with its own set of challenges. One common issue is browning leaves, which can be a sign of too much sunlight or not enough humidity. If you notice this, try moving the plant to a less sunny spot and increasing the humidity. Another challenge is slow growth, which can be due to insufficient nutrients. In this case, consider using a fertilizer specifically designed for carnivorous plants.
By keeping these tips in mind, you can successfully propagate pitcher plants indoors. Remember, patience is key. With the right care and attention, your pitcher plants will thrive and become a unique addition to your indoor garden.
Case Studies: Successful Propagation of Pitcher Plants
In this section, we will delve into real-life examples of successful pitcher plant propagation. These case studies will provide you with practical insights and tips that you can apply in your own propagation journey.
Case Study 1: Propagating Pitcher Plants in a Home Setting
Let’s take a look at the experience of Jane, a home gardener who successfully propagated her pitcher plants at home. Jane’s journey offers valuable insights into the propagation process in a home setting.
Jane started with a single pitcher plant, which she kept in a sunny spot in her living room. She watered it regularly, making sure the soil was always moist but not waterlogged. She also ensured the plant received plenty of indirect sunlight.
After a few months, Jane noticed that her pitcher plant was growing new shoots. Excited, she decided to propagate these shoots to grow more pitcher plants. She carefully cut the shoots, dipped them in rooting hormone, and planted them in a separate pot filled with peat moss and perlite.
Over the next few weeks, Jane kept a close eye on her new plants. She maintained the same care routine, ensuring they received enough water and sunlight. To her delight, the new plants started to grow and thrive.
Today, Jane has a beautiful collection of pitcher plants in her home, all propagated from that single parent plant. Her success story serves as an inspiration for all home gardeners interested in propagating pitcher plants.
| Key Steps in Jane’s Propagation Process |
|---|
| 1. Regular watering and exposure to indirect sunlight |
| 2. Cutting new shoots from the parent plant |
| 3. Dipping cuttings in rooting hormone |
| 4. Planting cuttings in a pot with peat moss and perlite |
| 5. Continued care for the new plants |
In conclusion, Jane’s case study demonstrates that with the right care and attention, it’s entirely possible to successfully propagate pitcher plants in a home setting. The key is to provide the plants with the right conditions and to be patient as they grow and develop.
Case Study 2: Large-Scale Propagation in a Greenhouse
Let’s now explore a case study that focuses on large-scale propagation of pitcher plants in a greenhouse. This study will provide valuable insights into how professionals manage to grow these fascinating plants on a grand scale.
The Greenhouse Setup
The greenhouse used in this case study was specifically designed for the propagation of pitcher plants. It had a controlled environment that could mimic the natural habitat of these plants. This included the right temperature, humidity, and light conditions.
| Greenhouse Condition | Details |
|---|---|
| Temperature | 70-75 degrees Fahrenheit |
| Humidity | 50-70% |
| Light | 12 hours of indirect sunlight |
The Propagation Process
The propagation process started with the selection of healthy mature pitcher plants. The cuttings were then taken from these plants and planted in a special soil mix. This soil mix was designed to provide the right nutrients and maintain the correct pH level for the plants.
After planting, the cuttings were regularly monitored and cared for. This included watering, adjusting the greenhouse conditions as needed, and checking for signs of growth.
The Results
After a few weeks, the cuttings started to show signs of growth. New leaves began to emerge, and eventually, new pitchers formed. By the end of the study, the greenhouse was filled with healthy, thriving pitcher plants.
This case study shows that with the right conditions and care, it’s possible to successfully propagate pitcher plants on a large scale in a greenhouse. It also highlights the importance of a controlled environment in the propagation process.
Conclusion: Key Takeaways on Propagating Pitcher Plants
As we wrap up our discussion on propagating pitcher plants, let’s revisit the key points we’ve covered. These insights will help you successfully propagate and care for your pitcher plants.
-
Recap of the propagation process:
The propagation process begins with taking a healthy cutting from a mature pitcher plant. This involves carefully selecting a stem with at least two leaf nodes, cutting it at an angle, and then placing it in a suitable growing medium. It’s important to maintain the right temperature and humidity levels to encourage root growth. Remember, patience is key as it can take several weeks for the cutting to develop roots.
-
Importance of post-propagation care:
Once your cutting has rooted, it’s crucial to provide proper post-propagation care. This includes gradually acclimating the new plant to its environment, ensuring it receives adequate light, and watering it appropriately. Regular feeding with a suitable fertilizer will also help your pitcher plant thrive. Neglecting post-propagation care can lead to plant stress or even death, so it’s a step that should not be overlooked.
-
Final tips for successful Pitcher Plants propagation:
Success in pitcher plant propagation is largely about attention to detail. Always use clean tools to prevent disease transmission, and choose your cuttings carefully. Monitor your plants closely for signs of stress or disease, and be ready to adjust their care as needed. Remember, every plant is unique and may require slightly different care. With patience and persistence, you can master the art of pitcher plant propagation.
In conclusion, propagating pitcher plants can be a rewarding experience. It allows you to expand your collection and deepen your understanding of these fascinating plants. By following the steps outlined in this guide, you’ll be well on your way to becoming a successful pitcher plant propagator.


